
Chocolate mocha cake is a must for anyone who loves coffee and chocolate together. Soft chocolate cake layers, creamy espresso filling, and lots of mocha buttercream make this cake absolutely incredible!
I like to pretend that coffee-flavored baked goods make suitable breakfasts. Anyone else? Because starting my day without coffee is kind of unthinkable.
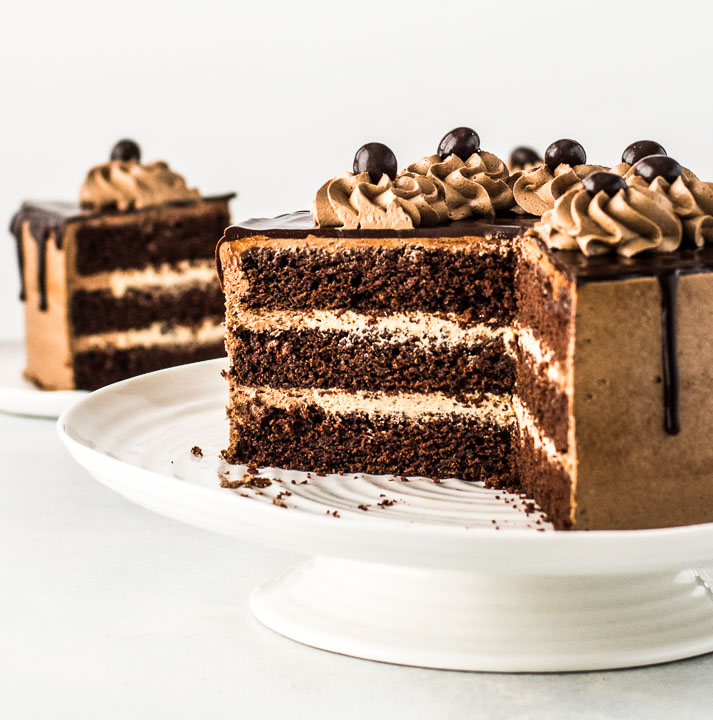
Soft chocolate cake layers, espresso cream filling, and mocha buttercream make this chocolate mocha cake the hands-down best breakfast ever :).
It also makes a pretty good dessert too (or even dinner, if that’s how you roll).
Why you’ll love this mocha cake:
- You don’t need a stand mixer to make it
- You can break the work up over a couple of days if you want
- It freezes well so you can always have a stash of cake on hand!
How to make the cake layers

- Combine the dry ingredients in a bowl
- Whisk together, then set aside
- In a second bowl, combine sugar, butter, and a few other ingredients and mix to combine
- Stir in the dry ingredients
- Then mix in coffee until smooth
- Divide between 8-inch round cake pans and bake!
Notes:
- If your cocoa powder is lumpy, sift it before mixing it with the dry ingredients.
- Don’t over-bake your cake because it has a tendency to dry out.
- If you like doctored cake mixes, you can totally sub your favorite doctored chocolate cake here as long as it makes three 8-inch layers.
- Be sure to cool your cake layers fully before filling and frosting them.
- If you want to make your cake layers a day ahead, cool them to room temp, then wrap tightly in plastic wrap and store them at room temperature overnight.
How to make the espresso filling

- Beat cream cheese and powdered sugar until smooth
- With mixer on medium, beat in heavy cream and beat until it holds stiff peaks
- Beat in espresso powder and vanilla
Then just pop your filling in the fridge while you make the frosting!
Notes:
- You can use low-fat cream cheese for the filling if you prefer but don’t use nonfat.
- You can use instant coffee rather than instant espresso, but your filling won’t have as strong a coffee flavor.
- “Stiff peaks,” as specified in the recipe, means that when you pull the beaters out of the filling mixture, the filling should hold its shape rather than fold in on itself.
How to make the frosting

- Beat room temperature butter until creamy
- Add powdered sugar, cocoa powder, and a few other ingredients
- Mix until very smooth and creamy
Notes:
- Your butter needs to be at room temperature so it mixes properly with the other ingredients and also so your frosting gets nice and fluffy.
- You can add more or less espresso powder depending on how deep a coffee flavor you want in your frosting.
- You can make the frosting a day before you use it. Store it, covered, in the fridge overnight. When you’re ready to use it, beat with an electric mixer set to high until it’s spreadable. (You might have to add a tiny bit of milk or cream but I don’t usually find that necessary.)
How to assemble your cake

- Pipe a circle of frosting around the edge of one cake layer
- Spread half of the filling inside
- Top with a second cake layer and repeat the process of piping and filling the circle, then top with the last layer
- Frost your cake with the remaining frosting
Then you’ll pop the cake in the fridge to chill overnight if you’re adding the ganache drip, or just decorate and serve if you’re not.
Note:
I reserved some frosting to pipe on top of my cake. If you want to do that, cover the leftover frosting with plastic wrap and refrigerate overnight. In the morning, beat it with an electric mixer on high speed until it’s pipe-able.
How to make the ganache drip

First, I’ll say that the drip is an optional way to adorn your cake—you can totally skip this step and your cake will still be delicious.
- Pour warm heavy cream over chopped chocolate and let it sit for a few minutes
- Whisk until smooth
- Transfer the ganache to a squeeze bottle or large plastic bag with one corner snipped off and squeeze a circle around the top of the cake, applying pressure in some points to create drips
Then spread the rest of the ganache inside the circle chill to set the ganache, and serve! (Or decorate with more frosting if you saved a little like I suggested above.)
How to store your cake
Uneaten chocolate mocha cake can be stored in the fridge, covered, for up to three days or in the freezer, tightly wrapped, for up to 3 months.
I like to freeze slices of cake individually. I freeze the slices on a baking sheet for half an hour to set the filling and frosting, then wrap tightly in plastic wrap and foil.
I just eat slices of cake frozen, but you can zap them in the microwave (unwrapped) for a minute or so to defrost them.
Helpful tools for making the cake
- These are the squeeze bottles I use for the ganache
- I use Medaglia d’Oro instant espresso powder
- This Ateco 849 tip is what I used for the frosting on top of the cake
- A cake turntable is really helpful for filling and frosting cakes because you can move the cake around so easily
- An offset spatula is also super helpful when you’re frosting cakes!
A few more recipes you might enjoy:
Coffee Cupcakes
Death by Chocolate Cake
Tuxedo Cake
Flourless Brownies

Did you make this mocha cake? Awesome! Let me know what you think with a comment and a rating below. Then post a pic on IG–tag @theitsybitsykitchen so I can see your delicious creations!

Chocolate mocha cake is a must for anyone who loves the combination of chocolate and espresso!
- Chocolate cake layers
- 2 1/2 cups all-purpose flour
- 1 cup unsweetened cocoa powder
- 2 teaspoons baking powder
- 1 teaspoon baking soda
- 1/2 teaspoon salt
- 2 cups granulated sugar
- 1 cup unsalted butter melted and cooled
- 1/4 cup vegetable oil
- 3 large eggs
- 2 teaspoons vanilla extract
- 1 1/2 cups lukewarm coffee
- 4 ounces full-fat cream cheese at room temperature
- 1/2 cup powdered sugar
- 1/4 cup heavy cream well chilled
- 1 1/2 teaspoons instant espresso powder
- 1/2 teaspoon vanilla
- 1 1/4 cups unsalted butter at room temperature
- 4 1/2 to 5 cups powdered sugar
- 1/2 cup cocoa powder
- 6 to 10 tablespoons milk or heavy cream
- 4 teaspoons instant espresso powder
- 1 teaspoon vanilla extract
- 1/2 teaspoon salt
- 5 ounces dark chocolate finely chopped
- 1/2 cup heavy cream
- Preheat the oven to 350. Spray 3 8-inch round cake pans with cooking spray.
- Line the bottoms of the pans with parchment paper, spray the paper with cooking spray and set pans aside.
- Combine the flour, cocoa powder, baking powder, baking soda, and salt together in a medium mixing bowl. (If your cocoa powder has a lot of clumps in it then sift it before mixing with the flour.) Whisk to combine, then set aside.
- Combine the sugar, butter, and vegetable oil in a large mixing bowl and whisk vigorously to combine. Whisk in the eggs and vanilla.
- Use a rubber spatula to mix the dry ingredients into the wet ingredients, then slowly mix in the coffee, stirring until just incorporated. (Take care to scrape the bottom of the bowl while you’re mixing to ensure all of the dry ingredients are incorporated.)
- Divide batter evenly between the prepared pans and bake for 26 to 32 minutes, until the cakes spring back when touched gently with your fingertip.
- Let cake layers cool in pans for 10 minutes, then run a knife around the edge of the pans and carefully remove. Transfer to a wire rack to cool completely before filling and frosting. Take care not to over-bake or the cake layers will be dry!
- Beat the cream cheese and powdered sugar in a medium bowl until smooth, scraping down the sides and bottom of the bowl as needed.
- With mixer on medium speed, gradually beat in the heavy cream.
- Once all the cream has been added, turn the mixer to high and beat until the mixture forms stiff peaks, then beat in the espresso powder and vanilla until fully combined.
- Refrigerate while you work on the frosting.
- Place the butter in a large mixing bowl and beat with an electric mixer until very smooth.
- Add 4 1/2 cups of the powdered sugar, the cocoa powder, 6 tablespoons of the milk or cream, and the espresso powder, vanilla, and salt. Mix on low until combined, stopping a few times to scrape the sides and bottom of the bowl.
- Turn mixer to medium and beat until frosting is very smooth. Add additional powdered sugar if frosting is too thin and additional milk or cream if it is too thick.
- Use a long serrated knife to trim your cake layers if they’ve domed. Set one layer on a cake stand or cardboard cake circle.
- Transfer about 1 cup of frosting to a piping bag fitted with a large round tip. Pipe a thick circle of frosting around the edge of the cake layer. Spread half of the filling inside the circle.
- Top with a second cake layer and repeat the process of piping and filling the circle.
- Use the remaining frosting to frost your cake. Chill the cake in the refrigerator for at least 4 hours before adding the drip. (If you’re not adding the chocolate drip then you can decorate the cake and serve now.)
- Heat the heavy cream in the microwave for 30 to 40 seconds, until very hot but not boiling.
- Place the chopped chocolate in a large bowl. Pour the warm cream over the chocolate and let it sit for 3 minutes. Whisk until completely smooth.
- Transfer the ganache to a plastic squeeze bottle (or a large zip-top plastic bag with one corner snipped off). Squeeze a circle of ganache around the edge of the cake, applying a little extra pressure at certain points to create drips.
- Carefully spread the remaining ganache over the top of the cake. If desired, decorate the top of the cake with chocolate-covered espresso beans. Refrigerate to set the ganache, then slice and serve.
- Uneaten cake can be stored (covered) in the fridge for up to 3 days, or in the freezer (tightly wrapped) for up to 3 months.
- You can store your cake layers overnight to fill and frost the next day. Cool them completely, then wrap tightly with plastic wrap and store at room temperature for up to a day.
- “Stiff peaks,” as specified in the filling section, means that when you pull the beaters out of the filling mixture, the filling should hold its shape rather than fold in on itself.
- Use more or less espresso powder in the frosting depending on how deep a coffee flavor you want your frosting to have.
- The chocolate drip is an extra step you can skip if you want; your cake will still be delicious without it!
Maggie says
Hi
Can you use espresso coffee that’s for a filter machine etc in this recipe
Kelsie says
In place of the coffee in the cake layers that’s fine! You just can’t use it in place of instant espresso powder.
Sadia says
The flavours were on point! But I used tub cream cheese instead of block and so my cream cheese frosting didn’t hold 🙁 – the tub cream cheese deflated instead of forming stiff peaks because of the excess moisture. I was also running short on icing – I did not have enough to ice my cake all around so it was naked, but it still looked good. I’m going to try making this again tomorrow, hopefully it will turn out better!
Kelsie says
I’m sorry the filling didn’t work out for you but I’m glad you at least enjoyed the flavors!
Kate says
About to make this and wondering if espresso powder is same as instant espresso coffee? The link you have goes to instant espresso but recipe says espresso powder.
Are these the same things? Can I use the instant espresso? I ordered it already. 🙂
Thanks, Kate
Kelsie says
It’s the same! Enjoy your cake!
Libby says
Just what I’ve been looking for. I’m making tomorrow but only have 2 8” pans. Will the better fit in just the 2 I have, or is it too much? Looks really really good. Thank you.
Kelsie says
Don’t bake the cake in two layers; I think there will be too much batter. Just re-use one of the cake pans (let it cool and wash it first). The batter for the last layer will be fine sitting out while you bake the first two layers. Hope you enjoy!
Lucy says
Awesome! Thank you very much for the quick reply. I would never have thought to do this, duhhh 😂.
Kristi says
Hi Kelsie!
I’ve made this delicious cake a few times with excellent results, thank you!
I’d like to make it this week for a work celebration…do you think the recipe would translate to two 13×9 inch pans?
Kelsie says
Hi Kristi! I’m so glad you like the cake! Unfortunately I think the cakes would be pretty thin if you made them in two 13X9s. It might work to make one 13×9 and make cupcakes with the remaining batter though.
Kelly says
Would adding a crunch inside add to this cake? Or doesn’t work together? Like a brittle crunch inside the filling. Or some kind of nuts?
Kelsie says
Hi Kelly! I think some kind of crunch in the filling would be lovely.
Amy says
The cake was a complete hit! It was so good and everyone loved it. I made it for my aunts 80th birthday. I did find however that the instructions on the filling didn’t work for me. I believe the instructions were to beat cream cheese and powdered sugar and then beat in the heavy cream. I couldn’t get stiff peaks to form. I beat it for 20 minutes. I ultimately had to scrap it and then whip the heavy cream separately from the cream cheese and powdered sugar and then combine them. Curious if anyone knows what caused that or if anyone had a similar problems. Once I did them separately it was perfect. I also had to double that recipe to have enough to fill the layers between my cakes. But even with those two things I would absolutely make this again. Loved it!!
Kelsie says
Hi Amy! I’m so glad you liked the cake! I’m not sure why the filling didn’t come together; I’ve never had that problem before. Was the heavy cream you added nice and cold? If it wasn’t cold enough that might have been the problem but that’s really the only thing I can think of! Thank you so much for the feedback and I’m so glad you found a solution!
Karen says
I made a filling just like this from another website a couple days ago and I too had that problem. I added a stick of butter ( room temp) and that helped. Creamed the butter first then slowly add the whipped cream filling. Hope that helps.
Leanne says
Coffee is essential for me! And a little in my chocolate cake sounds pretty darn amazing! Looks rich and decadent Kelsie, just as a chocolate cake should be. Happy weekend!
Alexandra @ It's Not Complicated Recipes says
Coffee and chocolate are two of the best things in life – I love that you have combined them to make one incredible cake!
sherry says
this looks completely delicious! i love mocha-flavoured food:) cheers sherry
Katherine | Love In My Oven says
Kelsie, no joke, I would actually eat this for breakfast. I mean, coffee, right!? Ever since buying (and devouring) a bag of chocolate covered espresso beans from Trader Joe’s when I was in the US I’ve been all about the coffee and chocolate combination! This cake needs to happen! Happy weekend! XO
Cheyanne says
Gurl, I’m down for coffee flavored ALL the things, especially a baked good! But I think that just makes me (and you!) sane and logical. Lol! This cake looks crazy delicious! As soon as I read the description I thought ‘this has my husband’s name written ALL over it’! He’s a chocolate and coffee lover so this cake would definitely make him swoon! This is such a beauty!!!! Cheers, girlie!
Laura says
WOW, Kelsie! That is a gorgeous cake! Here are the things I love most: coffee! Totally a breakfast food then! Chocolate, enough said. And you started the frosting with Cream Cheese! You totally know the way to my breakfast table. And dessert table. Awesome cake!
Mary Ann | The Beach House Kitchen says
You honestly make the most beautiful and delicious cakes Kelsie! This cake is just beautiful. And I LOVE the mocha flavor!
Kim Lange says
This gorgeous cake is a winner! I’m in love! Pinning, of course. 🙂
annie@ciaochowbambina says
Yep – I’m a huge coffee fan, and to have coffee in cake form? All the better! I need this cake in my life, my friend!! Pinned!
David @ Spiced says
HOLY MOLY, Kelsie! (Yes, all caps really were necessary there.) This cake is screaming my name right now. I love coffee-flavored desserts, and this cake is stunning. Also, chocolate ganache dripped down the side = optional? Um, no. Also, leftover slices? Um, no. 🙂 Pinning right now!
Dawn - Girl Heart Food says
I have got to start my day with coffee too!! And if it’s in the form of a cake, all the better 😉 Chocolate and coffee and so good together! I could definitely get on board with having this for dinner! Another beauty of a cake, Kelsie! Pinned 🙂 Have an awesome weekend!