
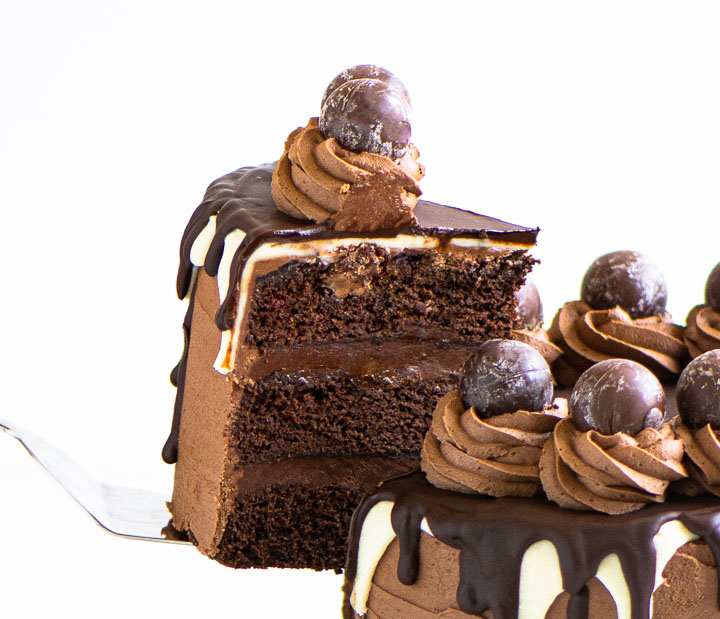
Soft chocolate cake layers, whipped ganache filling, and chocolate buttercream frosting make this death by chocolate cake the ultimate dessert indulgence. Finish your cake with a chocolate ganache drip to make it even more dramatic!
This post was originally published in April of 2018. I’ve updated the photos and added more information to the post but the recipe remains the same.
This post contains affiliate links. If you make a purchase using one of those links I may receive a small commission, at no additional cost to you. I only link to products I love and use myself. See full disclosure.
Say hello to our new favorite dessert.
I know I’m being presumptuous by saying that. And yes I don’t even know if you like chocolate and it’s possible that even if you like chocolate you don’t actually want to die of it.
(Although that sounds like a delicious way to go.)
This death by chocolate cake tastes like it came from a bakery but you can make it in your very own kitchen. And here’s how!
How to make your cake
Start with your cake layers

- Whisk together sugar, butter, and oil, then mix in eggs and vanilla
- Stir together your dry ingredients in a separate bowl
- Alternate mixing the dry ingredients and coffee into the wet ingredients, stirring until smooth
- Divide between three cake pans and bake for about half an hour
While your cake layers are cooling you’ll make the filling

- Heat heavy cream until it just starts to steam, then pour over chopped chocolate
- Let sit for a few minutes, then whisk until the ganache is smooth. Set aside to cool to room temperature
- Once the ganache has cooled and thickened, beat with an electric mixer until light and fluffy, adding a little powdered sugar as you beat
- Spread half of the ganache over one cake layer; top with a second layer and spread the remaining ganache over that. Top with the final cake layer and refrigerate for about 30 minutes
Once the filling has set, you’ll make the frosting
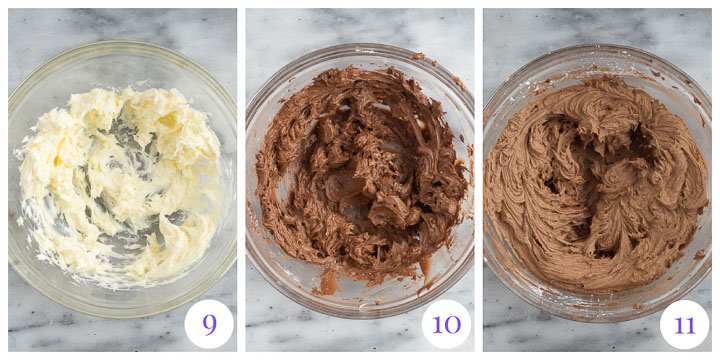
- Beat room temperature butter until smooth
- Mix in cocoa powder, milk or cream, and salt
- Gradually beat in powdered sugar and beat until light and creamy
Then frost your chilled cake. You can reserve some frosting to decorate the top if you want; just store it in the fridge (covered) overnight and beat it with a mixer until pipe-able when you’re ready to decorate.
If you’re adding the chocolate drip the cake needs to chill overnight. If not, serve and enjoy!
How to make a chocolate drip cake
The chocolate drips on this cake are totally optional. The white chocolate drip is very finicky so if you’ve never made a drip cake you might find it troublesome and want to skip it and just add the dark chocolate drip.
You’ll notice that the white ganache uses less heavy cream than the dark chocolate one—that’s because if you use the same amount of cream the white chocolate ganache won’t set up.
The white chocolate ganache takes longer to thicken up enough to drip down the sides of the cake than the dark chocolate does, so keep that in mind. If it’s really thin at first, that’s fine! Just let it sit at room temperature for awhile before using it (or even pop it in the fridge for a few minutes).
The method for both the white chocolate drip and the dark chocolate drip is the same

- Combine hot heavy cream and chopped chocolate
- Stir until smooth
- Transfer to a squeeze bottle and squeeze around the perimeter of the cake, then spread the rest of the ganache over the top
You’ll need to chill the cake to set the ganache before serving and in between the white chocolate and dark chocolate drips.
Recipe notes and tips
• To divide the work up over a couple of days: make your cake layers a day ahead. Once they’ve cooled completely, wrap them tightly with plastic wrap and let them sit at room temperature overnight.
• You can also make the frosting ahead. Once it’s done, cover the bowl and refrigerate for up to 2 days. When you’re ready to use it, beat it with a mixer on high until it’s spreadable again. (This could take a several minutes. You might have to add a tiny bit of milk or cream to get it to soften up, but I usually find I don’t need to; I just beat the heck out of it to warm it up.)
• Don’t over-bake your cake layers or they’ll turn out dry. This cake is really moist when it’s baked properly!
• If your cocoa powder is lumpy be sure to sift it before using in the cake and the frosting.
• Similarly, if your powdered sugar is lumpy, you’ll want to sift it before using in the frosting. (If it’s a newly opened bag of powdered sugar you shouldn’t need to sift it but I find sometimes it gets lumpy if it’s been in the pantry awhile.)
• Be sure the butter you use in the frosting is at room temperature. It can take anywhere from 20 minutes to an hour to come to room temp, depending on the temperature in your kitchen.
• When you frost your cake, be sure the frosting is as smooth as possible so the ganache drip flows nicely down the sides.
• Don’t use white chocolate chips for your ganache. They don’t melt well.
How to store cake
Uneaten cake can be stored, covered with a large plastic cake cover, at room temperature for about 2 days. It can also be stored (covered) in the fridge for 3 or 4 days.
Slices of cake can be frozen, tightly wrapped, for up to 3 months.
I recommend freezing slices on a parchment-lined baking sheet for an hour or so to set the filling and frosting, then wrapping tightly with plastic wrap and foil (or whatever you prefer when you freeze cake).
What is chocolate ganache?
Chocolate ganache is a mixture of chocolate and heavy cream.
When you refrigerate ganache, it sets up enough that you can form it into balls to create truffles. In its liquid form, it makes a beautiful finish for cakes.
When ganache is whipped, it becomes light and fluffy and is amazing to use as a cake filling because it’s so rich.
What chocolate to use for ganache?
I use Trader Joe’s Pound Plus chocolate pretty much any time I make ganache. It’s good quality for a great price.
If I’m making white chocolate ganache I like Baker’s or Ghirardelli.
Both brands also make good dark chocolate so if you don’t buy your dark chocolate at Trader Joe’s you can absolutely use those brands for all the chocolate in this recipe.
Helpful tools
• Because you want the frosting really smooth so the chocolate drip(s) flow nicely down the sides, an icing smoother or a large offset spatula are incredibly helpful.
• Any time you make a cake, a cake turntable is worth its weight in gold when you’re adding your fillings and frostings. The turntable allows you to move the cake and work on all sides of it, rather than you moving around the cake or just trying to turn the cake plate smoothly on your work surface.
• This is the piping bag and the Ateco 824 piping tip I used to decorate the top of the cake.
• The squeeze bottles I use don’t seem to be available on Amazon anyone but these bottles are pretty much the same thing. You can just use a plastic bag with a corner snipped off but I think you get a lot more control over your drips if you use squeeze bottles.
• I always use Trader Joe’s Pound Plus dark chocolate for the ganache filling and drip but if you don’t live near a Trader Joe’s, Baker’s chocolate and Ghirardelli baking bars are great and available at most grocery stores.
• I used Lindor Truffles to decorate my cake but chocolate sprinkles, crushed chocolate cookies, or any other kind of truffle would also be really nice garnishes.
A few more recipes you might enjoy
Triple Chocolate Cheesecake
Chocolate Tuxedo Cake
Chocolate Mint Cake
Raspberry Chocolate Cake
Mocha Cake

Did you make this death by chocolate cake? AWESOME! Let me know what you think with a comment and a rating below. And post a pic on Instagram too! Tag @theitsybitsykitchen so I can see!

- 2 cups granulated sugar
- 1 cup unsalted butter melted and cooled
- 1/4 cup vegetable oil
- 3 large eggs
- 2 teaspoons vanilla extract
- 2 1/2 cups all-purpose flour
- 2 teaspoons baking powder
- 1 teaspoon baking soda
- 1/2 teaspoon salt
- 1 cup unsweetened cocoa powder
- 1 1/2 cups warm coffee
- 1 cup heavy cream
- 8 ounces dark chocolate finely chopped
- 1/4 cup powdered sugar
- 1 1/4 cups unsalted butter at room temperature
- 1/2 cup cocoa powder
- 3 to 6 tablespoons whole milk or heavy cream
- 1/2 teaspoon salt
- 4 to 5 cups powdered sugar
- 6 ounces white chocolate finely chopped*
- 1/4 cup heavy cream
- 5 ounces dark chocolate finely chopped
- 1/2 cup heavy cream
- Preheat the oven to 350. Spray 3 (8-inch) round cake pans with cooking spray. Line the bottoms of the pans with parchment paper, spray the paper with more cooking spray, and set pans aside.
- Combine the sugar, butter, and oil in a large mixing bowl and whisk until combined. Beat in the eggs and vanilla.
- Combine the flour, baking powder, baking soda, salt, and cocoa powder in a medium mixing bowl and whisk to combine.
- Whisk half of the dry ingredients into the wet ingredients, then slowly mix in half of the coffee until just incorporated.
- Stir in the remaining dry ingredients, then the remaining coffee. Stir until well combined and free of lumps.
- Divide batter evenly between the prepared pans and bake for 28 to 32 minutes, until the cakes spring back when touched gently with your fingertip. Let cake layers cool in pans for 15 minutes, then carefully remove from the pans to cool completely on a wire rack.
- While your cake layers are cooling, make the filling. Place heavy cream in a small pot set over medium heat; heat until cream just starts to steam.
- Place chocolate in a medium mixing bowl and pour the hot cream over it. Allow to sit for 4 minutes, then whisk until chocolate is melted and mixture is smooth. Cool to room temperature (it should be pretty thick at room temp; if it’s not thick then it needs to sit longer).
- Beat the cooled ganache with an electric mixer set to low; gradually increase the speed to medium-high. Add the powdered sugar and continue beating until the ganache becomes light and fluffy.
- If your cake layers have domed, use a long serrated knife to trim them. Place one cake layer on a cake stand or cardboard cake circle and spread half of the whipped ganache over the top in an even layer.**
- Top with a second cake layer and spread the remaining ganache over the top. Top with the third cake layer. Refrigerate cake for 30 minutes (or until ganache filling is completely set), then make the frosting.
- Place the butter in a large mixing bowl. Beat with an electric mixer until very smooth, about 30 seconds.
- Mix in the cocoa powder, 3 tablespoons of the milk, and the salt. Turn mixer to low and gradually beat in 4 cups of the powdered sugar.
- Turn mixer to medium and beat until well combined, stopping the mixer occasionally to scrape the sides and bottom of the bowl. If frosting is too thin, add additional powdered sugar; if it’s too thick add additional milk.
- Pipe or spread the frosting over the top and sides of the cake. Take care to get the frosting as smooth as possible so your ganache can drip down the sides of the cake nicely.
- (Use a frosting smoother or an offset spatula to achieve this.)
- If you want, you can reserve some frosting to decorate your cake with after the ganache drip is added. Store it, covered, in the fridge until you’re ready to use it. Beat with an electric mixer on high to warm it up and make it pipe-able before using.
- Chill frosted cake overnight.
- Heat your heavy cream in the microwave for 15 to 20 seconds, until very hot but not boiling.
- Place your white chocolate in a small bowl and pour the hot cream over the top. Let sit for 4 minutes, then whisk until completely smooth. If ganache is too thick to drip nicely, pop it in the microwave for a few seconds. If it’s too thin, let it sit on the counter for a few minutes.
- Transfer to a squeeze bottle (or a large zip-top plastic bag with one corner snipped off) and squeeze a line of white chocolate around the perimeter of the chilled cake, squeezing harder in some places to create drips down the side of the cake.
- Use the remaining ganache to fill in the top of the cake. Refrigerate until ganache is set, then make the dark chocolate drip.
- Heat the heavy cream in the microwave for 30 to 40 seconds, until very hot but not boiling. Place the chopped chocolate in a large bowl. Pour the warm cream over the chocolate and let it sit for 4 minutes. Whisk until completely smooth.
- Transfer the ganache to a plastic squeeze bottle (or a large zip-top plastic bag with one corner snipped off).
- Squeeze a circle of ganache around the edge of the cake on top of the white chocolate, applying a little extra pressure at certain points to create drips. Carefully spread the remaining ganache over the top of the cake.
- If desired, decorate the top of the cake with chocolate candies. Refrigerate to set the ganache, then slice and serve.
- *Don’t use white chocolate chips—they don’t melt well. I recommend Baker’s or Ghirardelli white chocolate.
- **Taping an acetate cake collar around your cake is helpful to prevent the ganache from seeping out. If you don’t have cake collars you can chill your ganache until it sets up but is still spreadable.
- Uneaten cake can be stored, covered with a large plastic cake cover, at room temperature for about 2 days. It can also be stored (covered) in the fridge for 3 or 4 days.
- Slices of cake can be frozen, tightly wrapped, for up to 3 months.
- If your cocoa powder is lumpy, sift it before using in both the cake batter and the frosting.
- If you don’t want to add the chocolate drip you can skip the step of chilling your cake overnight and just serve it once it’s frosted.
- Be sure to use a big mixing bowl because there’s a lot of cake batter.
- I like to use really strong coffee in the cake layers; that gives the cake really good depth of flavor. Use whatever coffee you like and have on hand.
- Chopped Oreos, chocolate truffles, chocolate chips, chocolate jimmies, or any kind of chocolate candy are fun decorations.
Madisson says
Definitely trying this for my dads birthday. But do I have to chill the frosted cake over night?
Kelsie says
You only need to chill the cake overnight if you plan on adding the chocolate drips. The cake needs to be cold so the ganache doesn’t just run off completely; you could probably get away with chilling it for 4 to 6 hours but I always chill mine overnight.
Dotty says
Looking forward to trying this! Is the warm coffee just like 1 and 1/2 cup of strong instant coffee mixed with boiling water and left to cool off a bit before adding?
Kelsie says
Hi Dotty! Yes, just whatever coffee you’d drink; you don’t want it to be boiling hot so just let it cool for a few minutes before using it. Hope that helps–if you need more clarification just let me know and have a great weekend!
Cindy says
This is my new favorite cake recipe. I used a cake mix for the layers (hence four stars) but made your frosting and filling and they were wonderful. Next time I will make the whole thing from scratch but I was trying to save some time. Anyway, it was delicious! And I’ll make it again for my birthday next month.
Kelsie says
I’m so glad you liked it, Cindy! Thanks for letting me know!
Odette says
Was wondering if there is a mistake with the amount of powdered sugar for the whipped genache,mine was very thin.I added more powdered sugar and let it set a while
Kelsie says
Hi Odette! Sorry you’re having trouble with it–there shouldn’t be a mistake as that’s the way I always make whipped ganache. Was it still thin after you whipped it? The beating helps thicken it up. Letting it set for awhile is a good idea; it should continue to thicken as it sits. You can also pop it in the fridge if necessary. The cold will also help it thicken.
Corinne says
This cake is nothing short of decadent. It takes some time to make but totally worth it.
Kelsie says
Thank you Corrine!
Pies and Prejudice says
Oh man!! This looks absolutely fantastic! I’m seriously drooling looking at your shots of the cake and going through major chocolate withdrawals now haha. Even if I wasn’t a major chocoholic (I am), I am pretty sure I’d still love this cake. Thanks for the tips and info on the drip part, I’ve actually never made a drip cake but I’ve always wanted to give it a try. I have done the crumb coat thing a few times and it works out ok (a little messy lol) and I’d prefer to skip that step, too! It’s a bit of a hassle. I learned a bit of the basics when I took an intro cake decorating class but I’m still learning and love learning new techniques. I was terrible at the cake decorating at the time (you should have seen my first project–a cake for a friend’s wedding anniversary- which looked terrible haha) but I’ve learned a lot and my skills have improved with practice. Drip cakes are on my list to try so I want to make this asap! You’re just brilliant girl, this looks like the best chocolate cake ever!! 😀
Kelsie says
Haha! Drip cakes are so much fun and I know you’ll nail it! Thank you, Dana!
grace says
i’m not a chocolate lover, but i can still appreciate the absolute decadence of this!
Kelsie says
Thank you!
Laura says
Kelsie – I am SO making this. It’s gorgeous, and it’s birthday season at my house, so I’ve put it into the birthday rotation! 3 birthdays in the next 6 weeks, I may have to , uh, get to, make it twice! So thanks for the beautiful cake recipe!
Kelsie says
Thank you, Laura! Enjoy all the celebrations!
lynne hoareau says
OMW !!! You have my attention !!!! Kelsie, you are killing me (but in a good way) with all these scrumptious, delicious recipes. I am thankful we are heading for winter here…I can cover up with a big fat sweater 🙂 🙂 🙂
Kelsie says
Thank you, Lynne!