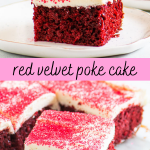
Red velvet poke cake is a quick, easy, and delicious dessert for any occasion. Soft cake is topped with sweetened condensed milk and cream cheese frosting—it’s absolutely irresistible!

Is there a more fun dessert than red velvet cake? Probably not! And this version is so moist and full of flavor.
With the sweetness of condensed milk and a little tang from homemade cream cheese frosting, every bite is bliss!
Why you’ll love this red velvet poke cake:
- Because the cake starts with a box of red velvet cake mix, it’s basically foolproof
- The homemade cream cheese frosting on top offsets the sweetness from the condensed milk so the flavors of the cake are beautifully balanced
- You don’t need a stand mixer for this recipe! Just an electric mixer and a mixing bowl
- You can store the cake in the fridge overnight so it’s a great make-ahead dessert for parties and potlucks
How to make your cake
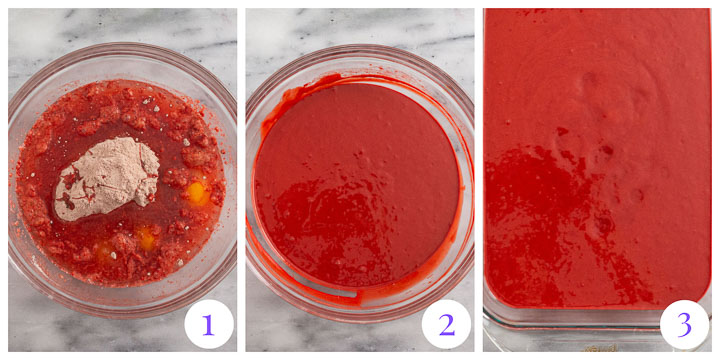
- Combine the cake ingredients in a large bowl
- Beat until smooth
- Pour into a 13- by 9-inch cake pan and bake for about 30 minutes
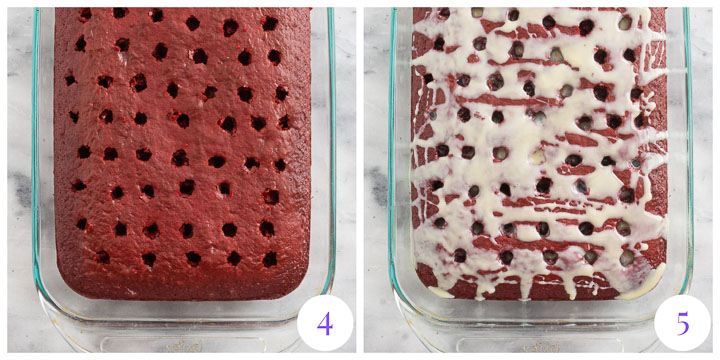
- Once the cake comes out of the oven, use the handle of a wooden spoon to poke holes in the top of the cake
- Pour sweetened condensed milk evenly over the top
Let the cake cool to room temperature, then refrigerate until chilled. After it’s chilled you’ll make the frosting.
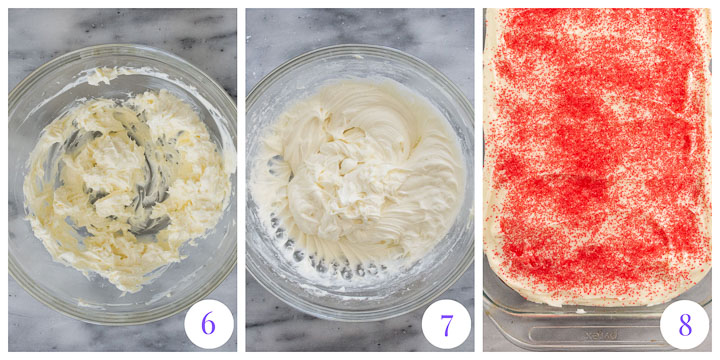
- Beat butter and cream cheese until smooth
- Mix in vanilla, salt, and powdered sugar
- Spread over the chilled cake and decorate as desired
Recipe notes and tips
•I used Betty Crocker Super Moist Red Velvet cake mix but you can use your preferred brand.
•Be sure your butter and cream cheese are both at room temperature before you make your frosting so your frosting doesn’t turn out lumpy.
•Butter takes about 20 to 30 minutes at room to come up to room temp (it depends on the temperature in your kitchen.) You can cut the butter into smaller pieces to bring it up to temperature faster.
•Cream cheese typically takes a little longer than butter to come up to temp.
•If your powdered sugar is really lumpy, sift it before using it in your frosting.
How to store poke cake
Uneaten cake can be stored in the fridge, covered, for up to 3 days.
Slices can also be stored, tightly wrapped, in the freezer for up to 2 months.
I recommend freezing slices on a foil-lined baking dish to set the frosting. That way you can wrap slices tightly and the frosting remains intact.
Ways to decorate your cake
I used red sanding sugar but the possibilities for decorating are endless. Here are a few more ideas; just use your creativity!
- Use red and green sprinkles for Christmas or red, white, and blue for the Fourth of July
- Chopped Oreos
- Mini chocolate chips
- Grated chocolate bars (milk, dark, or any kind of chocolate you like)
- Mini M&Ms
- Chocolate curls (make your own or buy some at the grocery store)
A few more recipes you might enjoy
Oreo Poke Cake
Coconut Poke Cake
Chocolate Cherry Cake
Amaretto Cake

Did you make this red velvet poke cake? Great! Let me know what you think with a comment and a rating below. And post a pic on Instagram too! Tag @theitsybitsykitchen so I can see!

This red velvet poke cake is an easy dessert that's perfect for holidays and special occasions. It turns out deliciously soft and moist every time!
- 15.25- ounce box red velvet cake mix*
- 3 large eggs
- 1 1/4 cups water
- 1/2 cup vegetable oil
- 1 teaspoon vanilla extract
- 1/4 teaspoon salt
- 14- ounce can sweetened condensed milk
- 8 ounces cream cheese at room temperature
- 1/2 cup unsalted butter at room temperature
- 1 1/2 teaspoons vanilla extract
- 1/4 teaspoons salt
- 4 to 4 1/2 cups powdered sugar
- Red sprinkles or sanding sugar if desired
- Preheat the oven to 350 degrees. Spray a 13- by 9-inch baking dish with cooking spray and set aside.
- Combine the cake mix, eggs, oil, water, vanilla, and salt in a large bowl. Beat with an electric mixer until smooth (about 2 minutes), stopping to scrape down the sides as necessary.
- Pour into the prepared baking dish and smooth the top.
- Bake 30 to 35 minutes, until a cake tester inserted into the center of the cake comes out clean.
- Set on a wire rack to cool for 10 minutes.
- After 10 minutes, use the handle of a wooden spoon to poke holes all over the top of the cake about 1 inch apart. Don’t go all the way to the bottom of the cake—only go about 3/4 of the way to the bottom.
- Pour the sweetened condensed milk evenly over the top. Cool the cake to room temperature, then cover and refrigerate for at least 2 or 3 hours, until fully cooled. (Overnight is fine!)
- When you’re ready to serve the cake, make the frosting.
Combine the cream cheese and butter in a large mixing bowl and beat until very smooth. Add the vanilla and salt and beat to combine.
- With mixer on low speed, gradually beat in 4 cups of the powdered sugar. Turn mixer to medium and beat until smooth and fluffy, scraping down the bowl as needed.
- If frosting is too thin, you can add a little more powdered sugar.
- Spread the frosting evenly over the cake and top with sprinkles. Serve.
- Uneaten cake can be stored in the fridge, covered, for up to 3 days. Slices can also be stored, tightly wrapped, in the freezer for up to 2 months.
- *I used Betty Crocker Super Moist Red Velvet cake mix
- Mini chocolate chips, mini M&Ms, chocolate curls, crushed Oreos, and grated chocolate bars are also fun ways to decorate your cake.
Annette says
Looks yummy! Question… In the ingredients you show butter as well as cream cheese for the frosting yet it’s not in the instructions. Perhaps you meant butter where you typed powdered sugar?
Kelsie says
OMG you’re right! I can’t believe I did that haha; it’s fixed now. Thank you!
sherry says
oh yum this sounds wonderfully decadent. must make!! i love cream cheese icing. and who doesn’t love condensed milk?
cheers
sherry
Laura says
I love red velvet cake, Kelsie! Im not sure whether it’s the cake or the cream cheese frosting, but something about the combination is magical! Love this easy recipe, too!