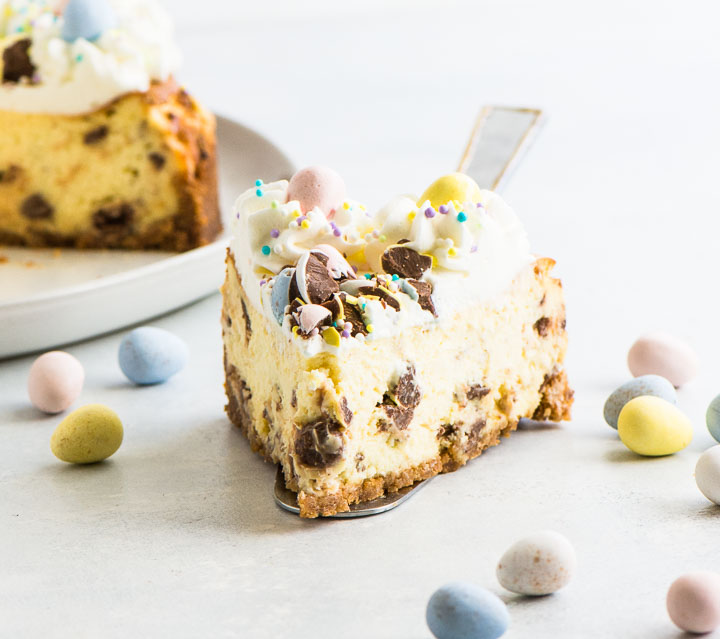
Easter egg cheesecake is an easy dessert that combines creamy cheesecake, chocolate candy Easter eggs, a crunchy graham cracker crust, and lots of whipped cream. It’s a delicious way to celebrate spring!
This post contains affiliate links. If you make a purchase using one of those links I may receive a small commission, at no additional cost to you. I only link to products I love and use myself. For the full disclosure, see here.
True or false: Easter candy is better than all the other candy. (TRUE!)
This Easter egg cheesecake combines two of the best things in the world: Easter candy and creamy, dreamy cheesecake. (Or three of the best things if we’re counting a buttery graham crust.)
And guess what? It’s easy to make. Even if you’ve never made cheesecake before you can totally do this. I promise. Whip one up for your Easter celebrations, or just to celebrate the fact that Easter egg season is short but oh-so-sweet :).
Why you’ll love this Easter egg cheesecake:
- No fussy water bath required
- You don’t need a stand mixer, just an electric mixer and a bowl or two
- It chills overnight (and up to a couple of days) so you can absolutely make it ahead!
How to make the graham crust

- Combine melted butter, sugar, and graham cracker crumbs in a bowl
- Stir until the well combined
- Press into the bottom and about an inch up the sides of a 9-inch springform pan
Then you’ll pop the crust in the freezer and work on the filling.
Note:
- If you prefer, you can use chocolate or vanilla cookie crumbs; either would be delicious.
How to make the cheesecake filling

- Beat cream cheese and sugar together until very smooth
- Beat in the sour cream, eggs, and a few other ingredients
- Fold in chopped candy eggs
- Pour into your chilled crust
Then bake for about an hour! When your cheesecake is done, it should look like the pic below.

Notes:
- I used Cadbury mini eggs but you can use another candy if you like; see below for ideas.
- Be careful when chopping your mini eggs—they roll! I recommend cutting the eggs in half one by one so they roll less, then chopping coarsely; they don’t need to be in tiny pieces but if you leave them too large the cake is more difficult to slice cleanly.
- Be sure your cream cheese is at room temperature. If it’s too cold, it won’t mix properly with the other ingredients and you could end up with chunks of plain cream cheese in the final product.
- The cheesecake is done if the center barely jiggles when you tap the side of the pan
- Remember that your Easter egg cheesecake needs to chill overnight before you serve it! Cool to room temperature before covering and chilling.
How to make the whipped cream topping

- Beat cold heavy cream until it starts to thicken
- Add powdered sugar and vanilla
- Beat until the cream holds stiff peaks
Notes:
- I strongly recommend using heavy cream rather than whipping cream in your topping because heavy cream holds its shape much better when whipped.
- Stiff peaks means that when you pull the beaters out of the bowl, the cream will hold its shape, not collapse in on itself.
- I used this large open star tip to pipe my whipped cream.
- If you want chocolate whipped cream, add 2 tablespoons of cocoa powder with the powdered sugar.
How to store your cheesecake
Uneaten cheesecake can be stored, covered with plastic wrap or foil, in the fridge for 3 or 4 days.
You can also store your Easter egg cheesecake in the freezer, tightly wrapped with plastic wrap and foil, for about 2 months.
If you want to freeze your cheesecake to serve at a later date, you can freeze it whole. Chill it overnight in the fridge as instructed in the recipe, then wrap the cheesecake (still in the pan) tightly with layers of plastic wrap and aluminum foil. Freeze for up to 2 months.
When you’re ready to serve, defrost the cheesecake in the fridge overnight. The next day you add the topping, then slice and serve.
You can also wrap individual slices tightly with plastic wrap and foil to store in the freezer. Defrost slices in the fridge overnight or at room temp for about half an hour. (Or eat them frozen!)
When I freeze slices of cheesecake (or any cake really), I like to place them on a foil-lined baking sheet, then freeze for 30 minutes or so, until they’re solid. Then I can wrap them tightly without disturbing the whipped cream/frosting.
Can I use other candy in the filling?
Definitely! I came this close to using Reese’s Pieces eggs rather than Cadbury mini eggs. Hershey’s eggs would be a really good choice too. You could even use a combination of different kinds of candy eggs.
Cadbury eggs happen to be one of my weaknesses but it’s your dessert so do it your way!
A few more recipes you might enjoy:
Carrot Cake Bars
Tiramisu Cheesecake
Coconut Custard Pie
Carrot Cake Cheesecake Cake
Toblerone Cheesecake
Did you make this Easter egg cheesecake? That’s great! Let me know what you think with a comment and a rating below. Then post a pic on IG–tag @theitsybitsykitchen so I can see your delicious creations!

Easter egg cheesecake is a simple yet delicious dessert for Easter or any time in the spring!
- 1 1/4 cups graham cracker crumbs from about 8 graham cracker sheets
- 3 tablespoons granulated sugar
- 6 tablespoons unsalted butter melted
- 1 1/2 pounds full-fat cream cheese at room temperature
- 1 cup granulated sugar
- 1 cup full-fat sour cream
- 1 teaspoon vanilla extract
- 1/8 teaspoon salt
- 3 large eggs
- 2 cups chopped Cadbury mini eggs*
- 1 cup cold heavy cream
- 1/3 cup powdered sugar
- 1 teaspoon vanilla extract
- additional chopped Cadbury mini eggs for garnish
- Preheat the oven to 350 degrees. Spray a 9-inch springform pan with cooking spray and set pan aside.
- Combine the graham cracker crumbs, sugar, and butter in a mixing bowl and stir until the crumbs are evenly moistened. Press the mixture into the bottom and 1 inch up the sides of the prepared pan.
- Freeze while you work on the filling.
- Combine the cream cheese and sugar in a large mixing bowl and beat with an electric mixer until smooth.
- Beat in the sour cream, vanilla, and salt to combine. Add the eggs 1 at a time and beat on low speed until just combined. Scrape down the sides and bottom of the bowl and beat about 30 seconds more.
- Fold in the chopped candy eggs.
- Pour into the crust and set the cheesecake on a baking sheet (to catch any butter that leaks out). Bake for 55 to 65 minutes, until the center barely jiggles when you tap the pan. (Your cheesecake will puff up quite a bit in the oven. Don’t worry, that’s normal!)
- Cool on a wire rack for 10 minutes, then run a knife around the edge of the pan to loosen the cake. Cool to room temperature, then cover loosely with plastic wrap and refrigerate overnight. (Be sure the cheesecake is fully cooled before you cover it or it will sweat and get soggy.)
- Once your cheesecake has chilled overnight, you’re ready to make the topping.
- Place a mixing bowl and the beaters for an electric mixer in the fridge to chill for 20 to 30 minutes (so your whipped cream will be extra stiff for piping).
- Beat the heavy cream until it thickens, then add the powdered sugar and vanilla and beat until the cream holds stiff peaks.
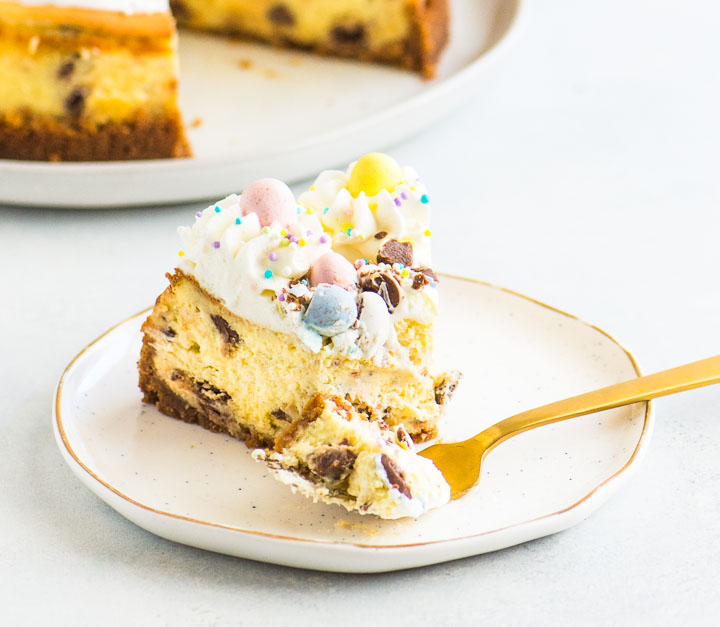
- Spread a layer of whipped cream over the cold cheesecake and pipe some around the edges of the cheesecake. (Alternatively, you can just spread it all on top.)
- Sprinkle the whipped cream with chopped mini eggs, then slice and serve.
- Uneaten cheesecake can be stored, covered, in the fridge for 3 or 4 days or in the freezer, tightly wrapped, for 2 months.
- *A 10-ounce bag of mini eggs is just enough for the filling; you’ll need more for topping the cheesecake. (I used about a half cup more for the topping.)
- Your cheesecake needs to chill overnight before serving! Keep that in mind when you plan your baking.
- If you prefer, you can use chocolate or vanilla cookie crumbs in the crust; either would be delicious.
- Take care while chopping your mini eggs because they roll and it can get a little dicey (no pun intended) for your fingers. I recommend cutting the eggs in half one by one so they roll less, then chopping coarsely; they don’t need to be in tiny pieces but if you leave them too large the cake is more difficult to slice cleanly.
- Be sure your cream cheese is at room temperature. If it’s too cold, it won’t mix properly with the other ingredients and you could end up with chunks of plain cream cheese in the final product.
- The recipe specifies chilling your bowl before making your whipped cream. If you just intend to spread the cream on top of the cheesecake rather than pipe it, you can skip that step.
- I strongly recommend using heavy cream rather than whipping cream in your topping because heavy cream holds its shape much better when whipped.
- If you want to top your cheesecake with chocolate whipped cream, add 2 tablespoons of cocoa powder with the powdered sugar.
Natalia says
Made it for Easter and it was absolutely amazing! Huge hit! Then I froze half and had it next week when my father in law come for a visit. Amazing both times
Kelsie says
I’m so glad you liked it!
Sherry says
Every year my daughter in law asks for a Cadbury egg cheesecake and every year I try a different recipe. Well, this year everyone agreed that this is the one. I don’t even like sweets very much anymore, but this was delicious!
Carolyn says
I made this for Easter last week and it was a big hit with the Family. Even the 1 year old loved it!
I used Oreo cookie crumbs for the base which I think enhanced the flavour of the cheesecake
A definite keeper!
Kelsie says
I’m so glad you enjoyed it!
Pam says
I made this last Easter. It was a hit. It was requested for Thanksgiving dinner this year. I used a hammer to crush the eggless. It was quick and no mess. My only issue is the garnish for this. We can’t get heavy cream. Any suggestions for topping?
Kelsie says
The reason I suggest heavy cream is because it whips up stiffer than whipping cream so it holds its shape better for piping. Whipping cream should be fine if you’re just going to make a mound of whipped cream on top. I’m so glad you and your family enjoy it!
Karen says
Put the mini eggs in a sandwich bag and pound with large knife handle or small hammer. Easy and no mess!
Kelsie says
Great idea!
Nancy from Canada says
My Granddaughter picked this for Easter. It’s in the oven. I hope nobody is on a diet. LOL
This is my first time baking a cheesecake. Your instructions are very good.
Kelsie says
Haha! Calories don’t count on holidays :). I hope you love it!
Melanie says
I’m going to make these this weekend!
Question tho, I am planning on making them individually into muffin tins for “mini cheesecakes”. What should I modify?
Thanks!
Kelsie says
Hi Melanie! Unfortunately I haven’t tried to bake this particular recipe in muffin tins so I can’t really give you much advice. What I would suggest is finding a recipe for mini cheesecakes and just mixing in chopped mini eggs. This recipe should work; obviously just omit the strawberry puree. I’m sorry I can’t be of more help!
Kat says
This looks amazing! I’m going to make this cheesecake recipe just curious why it doesn’t require a water bath? These steps will be okay in a springform pan nothing should leak?? And it says 8 servings could you get more out of ig
Kelsie says
It’s fine without a water bath but you’ll need to set the pan on a rimmed baking sheet (as directed in the recipe) because some butter does leak from the crust. You can definitely get more than 8 servings out of it–just cut the slices smaller!
Lana says
Fantastic!!! And the instructions are easy to follow!!!! Thank you!!! This will be an Easter tradition.
Kelsie says
I’m so glad, Lana!
Katie says
Instead of using a knife to cut the mini eggs I put them in a ziploc bag and smash them with a rolling pin ( in all honesty I use an empty wine bottle as a rolling pin haha). This has worked well for me. Easy clean up and no risk to the fingers.
Tracy says
Can you use the food processor to break up the candy for the filling?
Kelsie says
I think using a knife is better so you have total control over how much the candy gets chopped.
JS says
Definitely don’t food process. I take 10 or so at a time, lay a wide knife sideways and push down to crack them into pieces. So worth the couple minutes of work!
susie says
I put the mini eggs in a ziploc bag and then use a rolling pin to break them up
Lana says
I put the eggs in a freezer ziploc bag and use the flat end of meet tenderizer to smash the eggs. Works very well. No mess, just throw awa the bag.