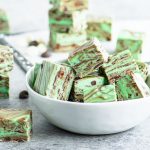
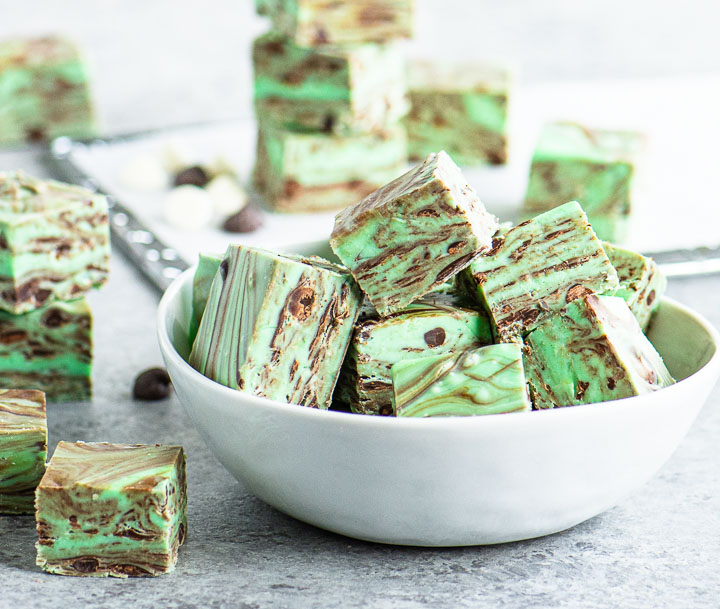
Chocolate mint fudge is an easy homemade candy that requires just a handful of ingredients and about 10 minutes of prep. It’s a quick and delicious dessert that anyone can make!
This post contains affiliate links. If you make a purchase using one of those links I may receive a small commission, at no additional cost to you. I only link to products I love and use myself. For the full disclosure,see here.
Prepare yourself. Not only is this chocolate mint fudge ridiculously sweet, minty, and creamy, but it’s also so easy to make that I’m (almost 100%) comfortable saying it’s foolproof.
It’s made with just a handful of ingredients and without sweetened condensed milk or marshmallow fluff.
And it’s basically everything I want to eat from now until summer. And then from summer until the end of the year. . .have I mentioned yet that it’s suuuuper delicious?
Why you’ll love this chocolate mint fudge:
- It only requires a handful of ingredients
- There’s no candy thermometer or other special equipment required!
- The fudge is easy enough that anyone can make it—it turns out smooth, creamy, and delicious every time
- It lasts for several months in the freezer so you can always have a batch on hand to satisfy your chocolate cravings
How to make your fudge
- Melt white chocolate chips in a microwave-safe bowl, stirring until smooth
- Stir in melted vanilla frosting, peppermint extract, food coloring, and salt
- Add mini chocolate chips and stir just a couple of times
- Pour into an 8-inch square baking dish and smooth the top
Chill for two hours or so, then slice and serve.
Recipe notes and tips
- I used this Wilton gel food coloring for my fudge. I recommend gel food coloring because you can get a deep color without adding much but if all you have is liquid that’s fine
- I used Pillsbury Creamy Supreme vanilla frosting but really any tub of store-bought frosting should work
- I used McCormick peppermint extract but if there’s another brand you prefer, that’s totally fine!
- Keep in mind that mint extract and peppermint extract have different flavors. I prefer peppermint extract in this recipe but if you’re a regular mint fan then I think that’s a fine substitute
- Be sure to melt your white chocolate chips slowly, as the recipe indicates. White chocolate is finicky and if you heat it too quickly it can seize up
- Once you add the mini chocolate chips, stir the fudge just 2 or 3 times—at most—or they’ll over-combine and you won’t be able to see much green
- If the mini chips don’t melt at all when you stir, that means your white chocolate chips and vanilla frosting weren’t very warm. That’s fine! Pop the mixture into the microwave for 3 or 4 seconds and try stirring again
How to store your fudge
Your peppermint chocolate fudge can be stored in an airtight container, layered with wax paper, in the fridge for up to a week.
It can also be stored in the freezer (in an airtight container layered with wax paper) for about two months.
Eat the fudge directly from the freezer or let it sit at room temperature to thaw a bit, whichever you prefer. It’s delicious either way!
Can I use regular chocolate chips in this recipe?
In place of the white chocolate chips, you sure can! You can use semi-sweet, milk, or dark chocolate chips, whichever you like.
Obviously you won’t see the green so you can omit the food coloring and, unless you want a little texture in your fudge, you can also omit the mini chocolate chips.
Don’t substitute regular-sized chocolate chips for the mini chips. They won’t melt as well so you won’t have swirls of chocolate, you’ll just have chunks of it.
Can I use homemade frosting?
Don’t use homemade frosting. You need to use the pre-made kind you find next to the cake mixes in the baking aisle of the grocery store. Homemade frosting will just melt and your fudge won’t set up.
I used a tub of Pillsbury Creamy Supreme vanilla frosting but any brand should work just fine. Be sure the tub is 16 ounces! The sizes vary quite a bit.
A few more recipes you might enjoy
Chocolate Mint Cupcakes
Chocolate Mint Cake
Nutella Fudge
Martha Washington Candy
Did you make this easy chocolate mint fudge? Hooray! Let me know what you think with a comment and a rating below. And post a pic on Instagram too! Tag @theitsybitsykitchen so I can see!

Chocolate mint fudge is an easy candy that's made in the microwave with less than 10 minutes of active time. It turns out deliciously creamy every time!
- 12 ounces white chocolate chips
- 1 16-ounce tub vanilla frosting*
- 1 1/2 teaspoons peppermint extract
- 1/4 teaspoons salt
- Green gel food coloring
- 1 cup mini chocolate chips
- Spray an 8-inch square baking dish with cooking spray. Line the bottom with parchment paper, spray the paper, and set pan aside.
- Place the white chocolate chips in a large microwave-safe bowl and heat in 15-second intervals, stirring well after each interval, until melted and smooth.
- Remove the lid and foil top from the tub of frosting and heat until pourable, about 30 seconds.
- Pour the frosting over the melted chips, then add the peppermint extract, salt, and food coloring. Stir to combine.
- Quickly add the mini chocolate and stir just 2 or 3 times—you want the chips to melt and create swirls in the fudge; if you stir too much your fudge will be brown rather than swirled.
- Pour the mixture into the prepared baking dish and smooth the top.
- Refrigerate for 2 hours, or until set. Slice and serve.
Recipe Video
- Uneaten peppermint chocolate fudge can be stored in an airtight container, layered with wax paper, in the fridge for up to 1 week.
- It can also be stored in the freezer (again in an airtight container, layered with wax paper) for about two months.
- *I used Pillsbury Creamy Supreme vanilla frosting
- If your mini chocolate chips don’t melt when you stir them in, pop the mixture into the microwave for 3 or 4 seconds, then stir again.


Carol says
Looks like a beautiful recipe. I cannot wait to try it! Thank you!
Kelsie says
Thank you, Carol!
sherry says
this looks very pretty kelsie. what a pity my hubby doesn’t like chocolate and mint flavours. sigh … of course that doesn’t stop me making it for myself 🙂