
This orange creamsicle cake is a fun dessert that tastes like a favorite childhood treat. It’s an incredibly easy recipe that’s always a crowd-pleaser!

Please tell me you’ll make this orange creamsicle cake sometime this summer. (Or, if you’re reading this in a few months, sometime this fall/winter/spring.)
Because it’s soooo good! And I really want everyone to enjoy a trip back to ice cream trucks and summers spent running through sprinklers just like I did with my first bite.
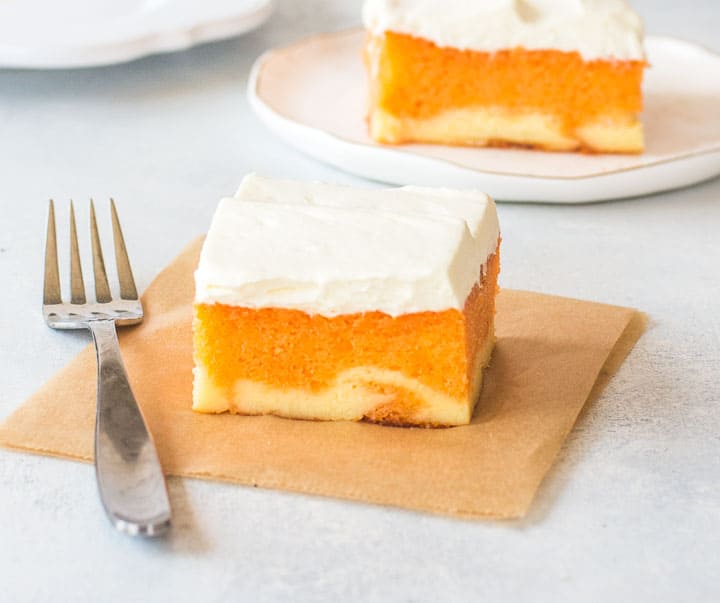
An easy orange cake is filled with a creamy, cheesecake-y filling and topped with whipped cream frosting. It tastes like the classic frozen treat in cake form!
Why you’ll love this orange creamsicle cake
- It’s easy to make!
- It uses simple, easy-to-find ingredients
- The cake starts with a box mix so it’s almost foolproof
How to make Orange Creamsicle Cake
You’ll start with the filling.

- Beat room temperature cream cheese with granulated sugar
- Add eggs
- Beat to combine
Set the filling aside and make the cake.
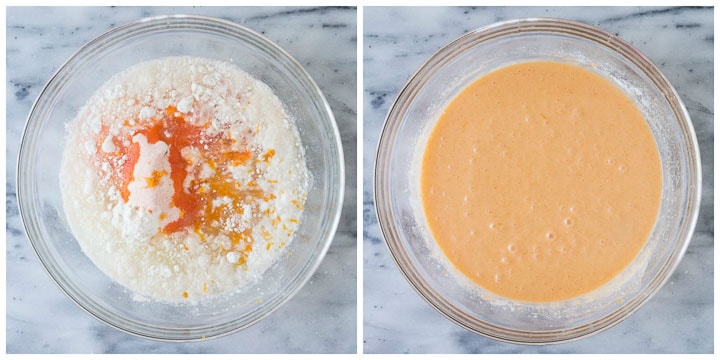
- Combine the cake ingredients in a large bowl
- Beat until smooth
Note: The orange in the cake comes from orange jello. The jello alone didn’t give as much orange flavor as I’d like so I also added orange zest. The zest is optional but I recommend adding it for more flavor.

- Pour half of the batter into a baking dish.
- Dollop the filling over the batter (you don’t need to smooth it or anything—just try to distribute it evenly)
- Top with the remaining cake batter and bake for about 1 hour
After you bake the cake, cool it to room temperature and then you’re ready to frost it.
You can refrigerate the cake overnight without frosting it if you prefer to divide the work up over a couple of days. Just be sure to cool it to room temp before popping it in the fridge.
How to make whipped cream frosting
The frosting on this orange creamsicle cake is a stabilized whipped cream frosting. If you prefer, you can omit the cream cheese in it but the frosting won’t hold its shape as long.

- Beat room temp cream cheese and powdered sugar until creamy
- Gradually add heavy cream and beat until stiff peaks form, then add the vanilla
- Beat to combine
Then it’s just a matter of frosting your cake, slicing it, and serving it. (And resisting eating a few too many slices.)
How to make whipped cream that holds its shape
If you opt to frost your cake with regular whipped cream rather than the version stabilized with cream cheese detailed in the recipe card, I have a few tips for ensuring it holds its shape as long as possible.
- Chill your bowl and beaters for at least 30 minutes before you make the whipped cream
- Be sure your heavy cream is also chilled really well
- Use a product labeled “heavy cream” or “heavy whipping cream.” DO NOT use “whipping cream”
Following those tips should give you a light, fluffy, and reasonably stiff final product, perfect for spreading or piping or dolloping!
And that’s it! However you choose to frost your cake, summer dessert is set! Break out this orange creamsicle cake and you’ll be the star of every BBQ you attend 🙂
A few more summery desserts
Raspberry Cupcakes
Fresh Strawberry Pie
Ice Cream Cone Cupcakes
Strawberry Shortcake Cupcakes

Did you make this orange creamsicle cake? Hooray! Let me know what you think with a comment and a rating below. Then post a pic on Insta! Tag @theitsybitsykitchen so I can see your beautiful creations!

Orange creamsicle cake is a fun and easy dessert for summer or any time of year!
- 12 ounces full-fat cream cheese at room temperature
- 1 cup granulated sugar
- 2 large eggs
- 1 (16.25-ouncbox white cake mix*
- 1 1/4 cups water
- 1/3 cup vegetable oil
- 3 large eggs
- finely grated zest of 1 orange optional but recommended
- 1 (3-ouncbox orange jello
- 4 ounces full-fat cream cheese at room temperature
- 1/3 cup powdered sugar
- 1 1/2 cups heavy cream well chilled
- 1/2 teaspoon vanilla
- Combine the cream cheese and granulated sugar in a small mixing bowl and beat with an electric mixer until smooth. Add the eggs and beat until well combined. Set aside and make the cake.
- Preheat the oven to 325 degrees. Spray a 13-by 9-inch baking dish with cooking spray and set aside.
- Combine the cake mix, water, vegetable oil, eggs, orange zest, and jello in a large mixing bowl. Beat with an electric mixer on medium speed until smooth, stopping to scrape down the sides of the bowl as necessary.
- Pour half of the cake batter into the prepared baking dish. Pour the cream cheese filling over the cake batter, distributing it as evenly as possible. Pour the remaining cake batter over the filling.
- Bake for 58 to 68 minutes, until a cake tester inserted into the center of the cake comes out clean. Remove from the oven and cool on a wire rack before frosting.
- Once the cake has cooled beat the cream cheese and powdered sugar in a medium bowl until smooth.
- Turn mixer to high and gradually beat in the heavy cream. Beat until the mixture forms stiff peaks, then beat in the vanilla.
- Spread the frosting over the cake, then slice and serve.
Recipe Video
- *I used Betty Crocker
- Store leftovers, covered with plastic wrap, in the fridge for up to 3 days or tightly wrapped in the freezer for up to 3 months.
- You can refrigerate the cake overnight without frosting it if you prefer to divide the work up over a couple of days. Just be sure to cool it to room temp before popping it in the fridge.
Farmarlow says
Loved it. the filling sinks to the bottom but soo yummy. I wish I had Nutritional info. (carbs)
Kelsie says
I’m glad you enjoyed it!
Michayla says
Can you make this as cupcakes?? Sorry if you already mentioned how… I’m not seeing it.
Kelsie says
Hi Michayla! That should be fine. Use the box of cake mix for guidance as to the baking time for cupcakes. If you want to add the filling, I think I’d halve the filling recipe and add about a tablespoon to each cupcake. You can use this cupcake recipe for guidance as to how to add the filling–I think that should work. Hope that helps!
Michayla says
Hi Kelsie,
Thanks for the reply. It didn’t work as cupcakes at all. I wouldn’t recommend it! Maybe I’ll try it as a cake someday…
Kelsie says
I’m sorry they didn’t work for you!
Jane says
This cake is awesome! Thank you for sharing your recipe.
I made this cake using a Duncan Hines Orange cake mix and used coconut oil in place of vegetable oil which added a tropical touch to it. I also added vanilla extract to the cream cheese filling.
The frosting takes a little patience. I added an extra 1/4 cup of powdered sugar and it finally firmed up. It was worth the effort.
I made this for my dad’s birthday and he believes you cannot have cake without ice cream so served with vanilla ice cream really put this cake over the top.
Kelsie says
Hi Jane! So glad you liked it! Your dad and I are on the same page when it comes to cake and ice cream 🙂
Dianna says
Great! Would love to try it in a Bundt pan. Would it cook through? Has anyone tried it?
How long would it take?
Kelsie says
Hi Dianna! Unfortunately I haven’t tried making this in a bundt pan so I can’t give you any guidance! I apologize!