
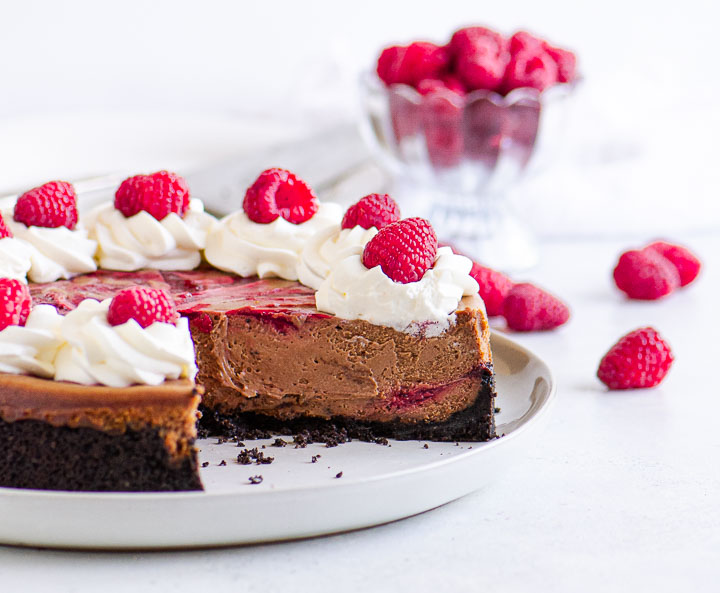
Chocolate raspberry cheesecake is a decadent dessert with a smooth chocolate filling, a sweet-tart raspberry swirl, and a buttery chocolate cookie crust. Because this recipe uses frozen berries, you can enjoy this cheesecake any time of year!
This post contains affiliate links. If you make a purchase using one of those links I may receive a small commission, at no additional cost to you. I only link to products I love and use myself. For the full disclosure,see here.
It’s been a little while since my last cheesecake, which means I owe you a really good one—and believe me, this chocolate raspberry cheesecake delivers.
Creamy, luscious, rich, and delicious, it’s the perfect thing to whip up when you’re craving chocolate.
And cheesecake slices are the perfect thing to store in the freezer in case you find yourself having a chocolate emergency. . .something that happens regularly at my house.
Why you’ll love this chocolate raspberry cheesecake:
- There’s no water bath required! The cheesecake turns out creamy without one
- This cheesecake freezes beautifully if you’re someone who likes to keep a little dessert on hand
- The raspberry swirl is made with frozen berries so if you can’t find fresh you can still make this
How to make your cheesecake
You’ll start by making the raspberry swirl

- Combine frozen berries, sugar, lemon juice, and cornstarch in a small saucepan
- Cook until the mixture is thick enough to coat the back of a spoon; you should be able to run your finger through it without the line filling in, as in the second picture above
- Strain through a fine mesh sieve to remove the seeds
Then you’ll set the mixture aside to cool. Once it’s cooled to room temperature, make the crust.

- Place Oreos the bowl of a food processor
- Process until finely chopped, then stream in melted butter
- Press into an even layer in the bottom and partway up the sides of a 9-inch springform pan
Freeze the crust for 10 minutes, then bake it for 10 minutes. Set on a wire rack to cool and work on the filling.

- Beat cream cheese and granulated sugar in a large bowl until smooth
- Beat in eggs, vanilla, and salt
- Mix in melted chocolate and beat until fully combined
- Pour half of the chocolate filling into the crust, top with half of the raspberry mixture and use a knife to swirl the two together. Top with the remaining filling and berry mixture and swirl again
Bake for about 40 minutes, then cool to room temperature on a wire rack. Once fully cooled, you’ll chill the cheesecake overnight.
When you’re ready to serve, spread or pipe whipped cream on top of the cheesecake and top with fresh raspberries.
Alternatively, you could top your cheesecake with chocolate ganache, like in this triple chocolate cheesecake. If you go that route, you’ll need to chill the cheesecake again to set the ganache before you serve it.
Recipe notes and tips
- Note that the cheesecake needs to chill overnight before you serve it so factor that into your baking plans
- If you don’t have a food processor you can crush the cookies (for your crust) in a zip-top plastic bag, then transfer to a mixing bowl and stir in the melted butter
- Your cream cheese needs to be at room temperature in order to mix properly with the other ingredients; it will take about 30 to 60 minutes on the counter depending on the temperature in your kitchen
- Don’t use reduced-fat or non-fat cream cheese! Your cheesecake won’t set up properly
- I always use Philadelphia cream cheese in cheesecakes. This post isn’t sponsored; some brands of cream cheese just don’t seem to set up as well after baking but Philadelphia always works well for me
- Be sure to set your springform pan on a baking sheet when you bake both the crust and the cheesecake; it will catch any butter that seeps out of the pan and save you from having to clean your oven
How to store your cheesecake
If you have leftover cheesecake, you can store it, covered, in the fridge for 3 or 4 days.
You can also store slices of cheesecake in the freezer, tightly wrapped, for up to 3 months.
I recommend setting slices on a parchment- or foil-lined baking sheet and freezing them for an hour or so to let the cheesecake harden. Then you can wrap them tightly in layers of plastic wrap and/or foil.
Defrost cheesecake slices in the fridge overnight or on the counter for a couple of hours. (Or just eat it frozen!)
How do I tell if my cheesecake is done?
Most cheesecakes are done when the center jiggles just a little if you tap the side of the pan. The edges should be set—if the edges still jiggle then your cheesecake definitely needs to bake longer.
But always consult your recipe—if the recipe gives you an indication that the filling shouldn’t jiggle at all or that the edges should jiggle too then go by that.
For this cheesecake, you want just a slight jiggle in the center. The edges won’t puff up much but they’ll appear set.
Helpful tools
- This is the springform pan I use
- I used this large open star tip to pipe whipped cream on top of the cheesecake
- I like to use a large offset spatula to loosen the cheesecake from the bottom of the pan, then I slide it off the base and onto a serving plate (before I decorate!)
- I use Trader Joe’s Pound Plus dark chocolate for almost all of my baking, including this cheesecake, but if you don’t live near a Trader Joe’s, any good baking chocolate is fine. Baker’s and Ghirardelli are two great brands available at most grocery stores
A few more recipes you might enjoy
Raspberry Cupcakes
Chocolate Raspberry Cake
Raspberry Cheesecake Cookies
Strawberry Layer Cake

Did you make this raspberry chocolate cheesecake? Hooray! Let me know what you think with a comment and a rating below. And post a pic on Instagram too! Tag @theitsybitsykitchen so I can see!

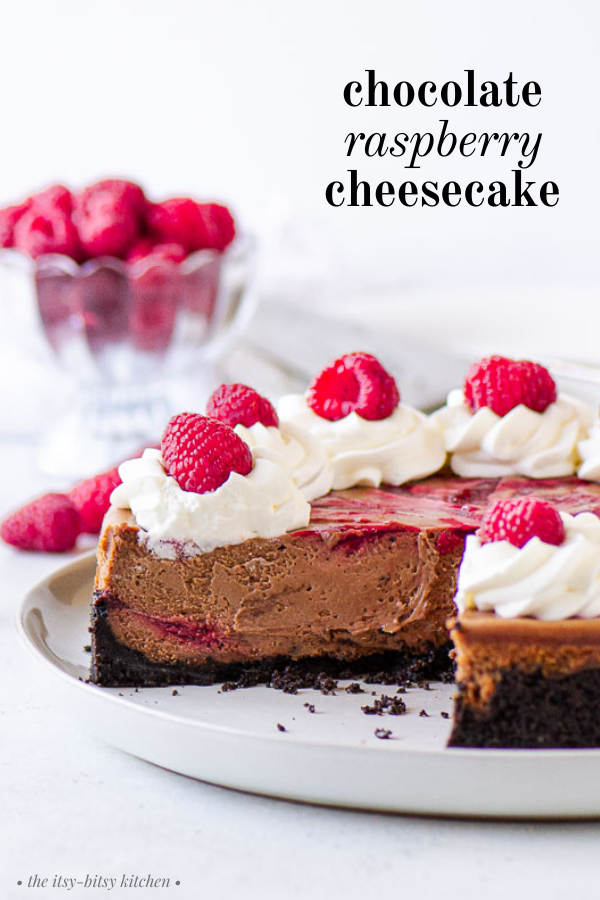
Chocolate raspberry cheesecake is a decadent dessert that's perfect for any occasion. With a smooth chocolate filling, a sweet raspberry swirl, and an Oreo cookie crust, it's irresistible!
- 2 cups frozen raspberries
- 1/3 cup granulated sugar
- 2 tablespoons fresh lemon juice
- 4 teaspoons cornstarch
- 26 chocolate sandwich cookies
- 5 tablespoons unsalted butter melted
- 4 ounces dark chocolate finely chopped
- 3 8-ounce packages full-fat cream cheese, at room temperature
- 1/2 cup granulated sugar
- 3 large eggs at room temperature
- 1 teaspoon vanilla extract
- 1/4 teaspoon salt
- Whipped cream
- Fresh raspberries
- Combine all filling ingredients in a small saucepan set over medium heat.
- Bring to a simmer, stirring constantly, and simmer until mixture is very thick and clings to a wooden spoon.
- Use a rubber spatula to push the mixture through a fine mesh sieve into small bowl to remove the seeds. (You’ll need to stir the raspberries around quite a bit in the sieve.)
- Set aside to cool completely before continuing with the recipe. (Once it’s cool you can cover it and refrigerate it for up to 3 days, but you’ll need to bring it back to room temperature when you’re ready to use it.)
- Preheat the oven to 350 degrees. Lightly spray a 9-inch springform pan with cooking spray and set pan aside.
- Place the cookies in the bowl of a food processor and process until they form fine crumbs. With processor running, stream in the melted butter. Process until the crumbs are evenly saturated, stopping to scrape the sides of the bowl with a rubber spatula as necessary.
- (Alternatively, you can place the cookies in a large zip-top bag and crush them with a rolling pin, then transfer to a bowl to mix in the butter.)
- Press the crumbs into the bottom and partway up the sides of the prepared pan. Freeze the crust for 10 minutes.
- Remove crust from the freezer, set the pan on a large rimmed baking sheet, and bake for 10 minutes. Cool the crust on a wire rack while you make the filling.
- Place the chopped chocolate in a small heat-proof bowl and microwave in 30-second intervals, stirring after each interval, until chocolate is melted and smooth.
- Set aside to cool while you continue with the filling.
- Place the cream cheese and sugar in a large mixing bowl and beat with an electric mixer on high speed for 5 minutes, stopping the mixer to scrape down the sides and bottom of the bowl as necessary.
- Add the eggs, vanilla, and salt and beat to combine.
- Scrape down the sides and bottom of the bowl, then beat in the chocolate until well combined. Scrape down the sides and bottom of the bowl, then beat 30 seconds more.
- Tap the bowl on the counter a few times to remove any bubbles, then pour half of the filling into the crust.
- Dollop half of the raspberry swirl over the filling and use a butter knife to swirl the two together, taking care to avoid poking the crust with the knife.
- Pour the remaining cheesecake filling on top, then repeat the dolloping and swirling with the remaining raspberry mixture.
- Set the cheesecake on a large rimmed baking sheet and bake 36 to 46 minutes, until the edges are set but the center of the cheesecake jiggles a bit with you tap the pan.
- Cool cheesecake to room temperature on a wire rack, then cover loosely with plastic wrap and refrigerate for at least 8 hours.
- Once your cheesecake has chilled, spread or pipe whipped cream on top of the cheesecake and garnish with fresh raspberries. Slice and serve.
- Uneaten cheesecake can be stored in the fridge, covered, for 3 or 4 days.
- You can also store slices of cheesecake in the freezer, tightly wrapped, for up to 3 months.
- I used Trader Joe’s Pound Plus dark chocolate. You can use chocolate chips but I prefer to use good baking chocolate because the flavor is so much better.
- Be sure to set your pan on a baking sheet when you bake both the crust and the cheesecake; it will catch any butter that seeps out of the pan and save you from having to clean your oven.
- See the body of this post for step-by-step photos.
Emmett says
Hi, I’m personally not a fan of dark chocolate. If I were to substitute the dark chocolate for milk chocolate, should I make any other changes to the recipe ? Thanks !
Kelsie says
You should be able to sub milk chocolate without any issues. The flavor just won’t be as rich.
Liz says
This is a beauty!! Love the raspberry swirl–you cannot beat the combo of chocolate with raspberries!
sherry says
nothing nicer than chocolate and raspberry together.