
This chocolate Oreo cheesecake looks like it took hours to make but it actually comes together without too much effort—and it doesn’t even need a water bath! It’s rich, delicious, and a decadent treat for chocolate lovers.

This post contains affiliate links. If you make a purchase using one of those links I may receive a small commission, at no additional cost to you. I only link to products I love and use myself. For the full disclosure,see here.
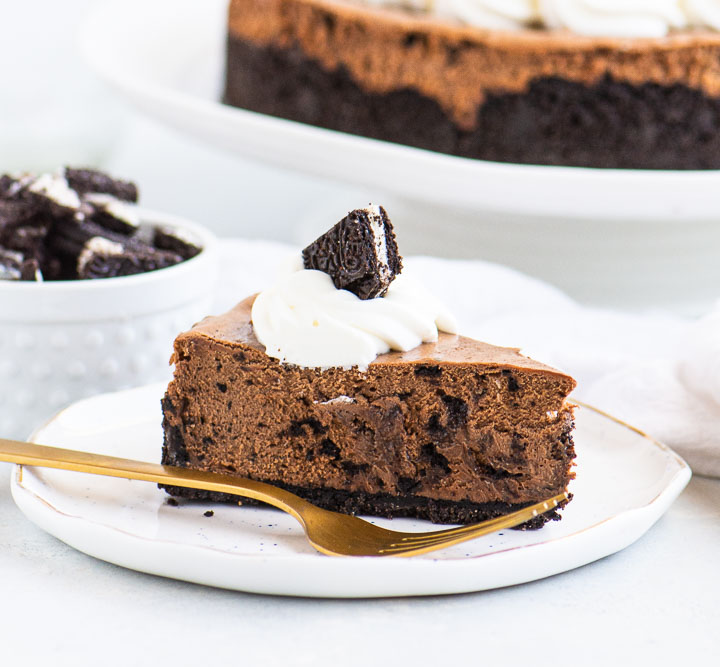
Chocolate Oreo cheesecake! Yep, that’s right. Rich chocolate cheesecake with Oreos in the filling, an Oreo crust, and extra Oreos on top—if you’re so inclined.
Cookies and cream lovers, this is the cheesecake of your dreams!
Why you’ll love this recipe:
- This cheesecake doesn’t require a water bath!
- It actually comes together pretty quickly—just keep in mind that the cheesecake needs to chill in the fridge overnight
- All of the ingredients are easy to find at any grocery store and you probably have most on hand already
How to make your cheesecake
Start by making the Oreo crumb crust

- Place cookies in a food processor
- Pulse until they form crumbs, then stream in melted butter until the crumbs are evenly saturated
- Press into the bottom and 1 inch (or so) up the sides of a 9-inch springform pan
Freeze the crust for 10 minutes, then bake it for 10 minutes. While it cools, move onto the cheesecake filling.

- Beat room temperature cream cheese with granulated sugar until smooth
- Mix in eggs, vanilla, and salt
- Beat in melted chocolate

- Add chopped Oreo cookies
- Fold in with a rubber spatula
- Pour into the crust and smooth the top
Then just bake your cheesecake, chill it overnight, and decorate as desired.
Decorating ideas for your cheesecake
I used whipped cream and more Oreos to garnish my cheesecake but you could use
• Sprinkles
• Or literally anything your imagination can dream up—chocolate cheesecake is blank canvas
How to store your cheesecake
Uneaten cheesecake can be stored in the fridge, covered with plastic wrap or foil, for 3 or 4 days.
You can also store slices of cheesecake in the freezer, tightly wrapped, for up to 3 months.
This cheesecake freezes well and is delicious right out of the freezer but you can also defrost your slices in the refrigerator overnight or on the counter until it softens up a bit.
Recipe notes and tips
• Be really sure your cream cheese is at room temperature before you make your filling. If it’s too cold, you could end up with lumps in your cheesecake
• Cream cheese can take anywhere from 30 to 60 minutes to come up to room temp; it depends on how warm your kitchen is
• A 14.3-ounce package of Oreos will be just enough for the filling and crust; you’ll need to get a large package if you want to decorate the top with cookies too
• I used Trader Joe’s Pound Plus dark chocolate in the cheesecake filling. You can use chocolate chips in a pinch but I prefer to use good baking chocolate because the flavor is so much better
• Other good chocolate options for baking are Baker’s or Ghirardelli; both are easy to find in the baking aisle at most grocery stores
• Be sure to set your pan on a baking sheet when you bake both the crust and the cheesecake; it will catch any butter that seeps out of the pan and save you from having to clean your oven
How do I know when my cheesecake is done?
Most cheesecakes are done when the center jiggles just a little if you tap the side of the pan. The edges should be set—if the edges are still jiggly then your cheesecake needs longer in the oven.
But always consult your recipe—if the recipe gives you an indication that the filling shouldn’t jiggle at all or that the edges should jiggle too then go by that.
For this Oreo chocolate cheesecake, you want just a slight jiggle in the center. The edges will puff up a little bit and they’ll be set when you tap on the side of the pan.
A few more recipes you might enjoy
Toblerone Cheesecake
Oreo Cheesecake Brownies
Oreo Fudge
Chocolate Raspberry Cheesecake
Did you make this recipe? That’s great! Leave me a comment and rating below! And post a pic on Instagram. Tag @theitsybitsykitchen so I can see!

Rich, decadent, and super chocolatey, this chocolate Oreo cheesecake is a must for chocolate lovers!
- 24 Oreo cookies
- 4 tablespoons unsalted butter melted
- 4 ounces dark chocolate finely chopped
- 3 8-ounce packages full-fat cream cheese, at room temperature
- 1/2 cup granulated sugar
- 3 large eggs at room temperature
- 1 teaspoon vanilla extract
- 1/4 teaspoon salt
- 12 Oreos chopped
- Whipped cream
- Chopped Oreos or other garnish
- Preheat the oven to 350 degrees. Lightly spray a 9-inch springform pan with cooking spray and set pan aside.
- Place the cookies in the bowl of a food processor and pulse until they form crumbs. With processor running, stream in the melted butter. Process until the crumbs are evenly saturated, stopping to scrape the sides of the bowl with a rubber spatula as necessary.
- (Alternatively, you can place the cookies in a large zip-top bag and crush them with a rolling pin, then transfer to a bowl to mix in the butter.)
- Press the crumbs into the bottom and about an inch up the sides of the prepared pan. Freeze the crust for 10 minutes.
- Remove crust from the freezer, set the pan on a large rimmed baking sheet, and bake for 10 minutes. Cool the crust on a wire rack while you make the filling.
- Place the chopped chocolate in a small heat-proof bowl and microwave in 30-second intervals, stirring after each interval, until chocolate is melted and smooth.
- Set aside to cool while you continue with the filling.
- Place the cream cheese and sugar in a large mixing bowl and beat with an electric mixer on high speed for 5 minutes, stopping the mixer to scrape down the sides and bottom of the bowl as necessary.
- Add the eggs, vanilla, and salt and beat to combine.
- Scrape down the sides and bottom of the bowl, then beat in the chocolate until well combined. Scrape down the sides and bottom of the bowl, then beat 30 seconds more.
- Use a rubber spatula to fold in the chopped Oreos, then pour the filling into the crust.
- Set the cheesecake on a large rimmed baking sheet and bake 36 to 46 minutes, until the edges are set but the center of the cheesecake jiggles a bit with you tap the pan.
- Cool cheesecake to room temperature on a wire rack, then cover loosely with plastic wrap and refrigerate for at least 8 hours.
- Once your cheesecake has chilled, spread or pipe whipped cream on top of the cheesecake and garnish with chopped cookies. Slice and serve.
- Uneaten cheesecake can be stored in the fridge, covered, for 3 or 4 days.
- You can also store slices of cheesecake in the freezer, tightly wrapped, for up to 3 months.
- A 14.3-ounce package of Oreos is exactly 36 Oreos; you’ll need to buy a larger package if you want to have extra for decorating.
- I used Trader Joe’s Pound Plus dark chocolate in the cheesecake filling. You can use chocolate chips but I prefer to use good baking chocolate because the flavor is so much better.
- Baker's and Ghirardelli are also good chocolate options for your filling.
- Be sure to set your pan on a baking sheet when you bake both the crust and the cheesecake; it will catch any butter that seeps out of the pan and save you from having to clean your oven.
- See the body of this post for step-by-step photos.
remy says
so delicious! we used an 8 inch cake pan because it was what we had. no springform, we just lined with parchment and butter and flipped it over when it was cooled. baked at 350 for 45 minutes in a water bath and it was perfect.
Kelsie says
I’m so glad you enjoyed it!